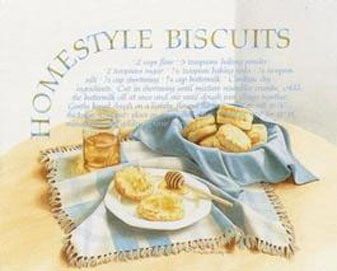
Recipes
(click on the biscuits)
Measurements:
oz - Ounce
tsp - Tea Spoon
lb - Pound
Tbs - Table Spoon
pt - Pint
c - Cup (8 oz)
qt - Quart
pkg - Package
gl - Gallon
Conversions:
1 Tbs
= 3 tsp
1 dash = 1 pinch
2
Tbs = 1 oz
1 Stick Butter = ¼ lb or ½ c or 8 Tbs
¼c = 4 Tbs
1 lb bread loaf = About 17 slices
1/3c = 5 1/3 Tbs 1
¼ lb loaf = About 20
½c = 8 Tbs
1 ½ lb loaf = About 23
1
c = 8 oz
1 qt = 4 c
2 c = 1 pt
1 gal = 4 qt
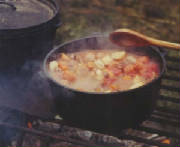
Dutch Oven Recipes
(click on the dutch oven)
Cooking Over a Wood Fire
It takes a good while for a fire to get hot enough to cook over. Strange as that may sound, it is absolutely
true.
Under ideal circumstances, you’ll cook over a fire in which nothing but well dried hardwood is being burned.
It will be a fire that, when you cook breakfast, some early riser has been so thoughtful as to get the fire started early
in the morning before you even thought of stirring from your bed; and for dinner and supper, the fire will have been well
maintained by every camp member who walked past it during the day.
In all likelihood, though, you’ll be cooking over green soft wood such as pine. Pine by itself will never
give you the desired nice, even bed of coals so important to cooking. This is the fire that will cover your pots and pans
with a fairly heavy layer of soot. But the fact is, this is the sort of fire you’re more apt to have to cook over than
the ideal. That being said, you need to know how to put it to work.
Site conditions and event rules will tend to dictate the way in which your fire is built. Some events cannot
or will not permit you to dig a fire-pit over which you would place your grill. A fire-pit is the preferred method of cooking
over a wood fire since it will be less affected by breezes than a fire that is built on the ground. That’s why there
are three reasons to remove the dirt for a fire-pit and heap it around the fire-pit itself:
1. It tends to help contain the fire & prevent it from spreading.
2. It allows you, at event’s
end, to refill the fire-pit and leave your camp site essentially as it was; and
3. To help shield the fire from breezes
and winds so that you can have the benefit of as much of the heat from the fire as you will need to cook over.
In the case of green wood, piling wood all around it, primarily at the upwind side, will help keep the heat
where it needs to be.
An important matter to remember is that, after you are done cooking you will not have access to a dishwasher.
So it is prudent to put a kettle or pan or coffee pot of wash water on the fire to heat up as soon as your have taken the
food off the grill. That way, the water can be heating while you eat making it much easier to wash plates and utensils. In
fact, it’s a good idea to have hot water available all the time. Hot water comes in handy for washing dishes, washing
your eye-glasses, coffee, tea, grits, and oatmeal and even for getting a running start in making a soup or stew.
 Cooking with Cast Iron
New cast iron cookware has a gray metallic color. In order to prepare it for cooking, and to attain that black, relatively
non-stick surface, it must be seasoned. Cast iron requires seasoning because it is its nature to rust when it comes into contact
with water. Most cast iron cookware manufacturers recommend a solid vegetable shortening like Crisco instead of lard.
Since this takes a bit of time, we recommend that this be done at home.
Before applying the solid vegetable shortening, warm up the cast-iron pot or skillet and then rub a thin layer of Crisco
all over it, both inside and out. Ay the pot, pan, or skillet upside down in an oven that has been preheated to between 300°
and 350°. By heating, the pores of the cast iron will open up, enabling it to absorb the shortening. Use a small amount of
shortening to begin with since cast iron can only absorb so much and the rest will be on your oven floor. Let the empty cookware
cook for an hour in the oven before turning the heat off. Leave it in the oven until the cookware is cool to the touch. Because
cast iron holds its heat well, it is best to let cool overnight. It is necessary to season the cookware regularly. Cast iron
WILL rust if you don’t season after each use.
When you clean your cookware, NEVER use soap!! Instead, use boiling water and a high quality scrub brush to clean
it. Those who are unfamiliar with cast iron may question the sanitary aspects but the combination of boiling water and a scrub
brush will rid & sanitize the cookware and the seasoning process will kill whatever crawls into it afterwards. REMEMBER
when you get home from an event, at some point you need to re-season the cookware before its next use.
Cooking with cast iron is far more difficult than it might appear, particularly when the cooking is done over an open fire.
Cast iron retains heat well, and for protracted periods of time. The entire skillet or pot gets very, very hot, and it retains
heat in a way that aluminum or stainless steel or other types of cookware cannot. With no means to regulate the heat level
as we have on modern ranges, other means must be used, including marking the amount of time the cast iron cookware has been
over or on the open flame.
Pouring a measurable quantity of something cold into a cast iron piece when the cast iron is very hot can cause the cookware
to break, particularly if there is a seam in the cookware.
Always preheat the cast iron before you put food into it. As you preheat it and prepare to cook over a wood fire, you’ll
find it wise and prudent to check the relative temperature of the cookware before you fling food into it. You can routinely
test cast iron cookware with drops of water to see if it is too hot, not hot enough, or just right. If you sprinkle a few
drops of water into the cast iron and the water evaporates upon contact, you should know that the cast iron is so hot that
it will surely burn everything that is placed in it. If the water drops land in the cookware and does nothing, the cookware
is not hot enough. When the water sizzles, each drop takes on a ball-like shape and rolls around the cookware almost as if
it has life of its own but the water “balls” do not immediately disappear, it is then hot enough to cook with.
Cooking With a Dutch Oven
Before you begin cooking with a Dutch oven, please familiarize yourself with cooking with cast iron, and cooking over a
wood fire. One of the most useful utensils was the Dutch oven. It is a thick, heavy, round, cast iron pot with a flat bottom
handle, three legs, and a cast iron lid that has a half-inch lip all the way around the edge and a handle in the center. Sizes
range from 8” to 24” in diameter, and 4” to 6” deep – a heavy but durable piece of cooking gear.
During the colonial times, the Dutch over was widely manufactured in the New England States. It got its name – the
Dutch Oven – after traders from Holland bought large numbers for barter with the Indians and frontier settlers. Following
its widespread use in the colonies, the oven was recognized as an indispensable utensil in the family’s belongings and
went west to Kentucky and the Territories in wagons and packs and miners’ mule packs.
Dutch ovens were most commonly used to bake bread or biscuits, but they also found geat utility in baking cakes, potatoes,
roasting meats, and making stews or soups. One variation of the Dutch oven looks like a large frying pan with four small legs.
The Dutch oven would be placed on hot coals that had been raked directly onto the hearth. The lid and oven were preheated,
the oven preheated on the coals themselves while the lid would be preheated directly on the fire. When the oven and lid were
sufficiently hot, whatever was going to be baked - bread or whatever was being prepared - would be poured into the oven. Then
the lid would be set on top of the oven with a pair of tongs or a hook. Coals would they be piled on top of the lid to add
heat and to keep the heat even; thus the appellation "oven" was appropriate. The lip around the edge of the Dutch oven would
prevent the coals from rolling off.
Guesstimating the tempature of the coals is quite a feat. If you are using charcoal briquettes to make your Dutch over
bake like the oven most of us are more familiar with, most manufacturers agree that a tempature of 350° is reached with 6
to 8 evenly distributed charcoal briquettes placed under the Dutch oven, and another 14 to 16 evenly placed briquettes are
placed on the lid. As pat as this may seem, the fact is that few of us will be using charcoal however, know the number of
briquettes used to attain that approximate tempature should be of some small help in assessing how close you'll get with the
coals from a wood fire.
Just as any form of cooking over an open fire, and most especially with cast iron, you must exercise great care that the
coals under the oven are not too hot, or the food will burn; and the food can burn quite quickly. The lid, when heaped with
coals, will tend to be far hotter than the bottom because the heat in the lid is not transferred or dissipated through direct
contact with the food. The exception to that would be when you're cooking bread and the bread is able to rise so high that
it touched the lid; in which case the top of the bread is apt to burn quickly, too.
Experience will be the best guide in deciding when a Dutch oven meal is ready. Keep one eye on your fire or coals, and
the other eye on your watch. As the saying goes, "If you snooze, you lose". Avoid lifting the lid of the oven to look at the
food. As you've probably learned, opening any oven - including a Dutch oven - causes the oven to lose precious heat. Every
peek into the oven can cost you between 5 to 10 minutes of cooking time.
Cooking With Tin
Since tin is relatively thin, cooking with tin seems like a great idea for those who are in a rush. Heat transference is
very quick with, and putting a tin coffee pot or tin cup on the fire for some coffee (instant or otherwise) seems like a good
idea. While it certainly can be done, there are several cautions that need to be observed.
Don't lose sight of the fact that tin cups and tin pots are soldered. Solder has a relatively low melting point, soldering
guns generating about the same amount of heat as a woodburning tool. If the solder that holds the handle on the cup or pot
melted at a low heat when it was constructed - and it did - then it will certainly melt on a roaring fire, or even over a
nice bed of hot coals unless you observe prudent practices.
If the flames are high, don't put the cup or pot on the fire. Flames that can reach the handle(s) or spout will most likely
melt solder and destroy your tinware. Always make sure that the liquid in the tinware reaches a level at least as high as
the cup or pot's handle, or spout. So long as there is plenty of fluid in the container, it will keep the tempature of the
container at the same level as that attained by the liquid as it heats. Since water boils at 212° Fahrenheit (100° Celsuis) and
solder melts at a slightly higher tempature, so long as the liquid is below or at boiling point, the tinware will be safe.
Food Preparaton Suggestions
Many folks in re-enacting are pressed for time during an event. Since few events have everything go according to schedule,
that means that activities which start late tend to end late, and that squeezes the amount of preparation time for meals.
Some folks elect to "cheat" a little bit on their food preparation, and actually cook their food at home before going to the
event, freeze it, and bring it along in their coolers to be thawed and heated over the campfire. For those who choose not
to do that, following is a list of suggested meals and some guesstimated cooking times.
Breakfast
Always keep the cast iron pots and pans close to the fire, especially if they are cast iron, so as to keep them warm or
moderately hot.
Some folks advocate keeping rolls and sliced bread handy in lieu of hardtack or making biscuits fresh. While it may lack
somewhat in authentic appearance, it has the redeemin qualities of tasting good and being ready to go when everyone gets up
in the morning.
Like bacon, link sausage or sausage patties will help generate some or all of the grease that will be necessary to grease
the cooking pots and pans so that you can make eggs in them without having them stick to the pots and pans. A form of breakfast
that can be prepared and ready to eat in less than a half an hour for a large group of people includes sausage that is being
cooked to generate grease as well as serve as the meat anchor to the breakfast. As the sausage begins to cook, add thinly
sliced potatoes to the mix. After the mixture has cooked for approximately ten minutes, add thinly sliced onions; and after
another five minutes have passed, add sliced apples. Serve with or without biscuits. Frying ham and scrambling eggs requires
roughly 15 to 20 minutes to cook, and can be cooked in the same skillet, taking advantage of the grease generated by the ham.
However, the ham grease will most likely have to be supplemented with butter or cooking oil. Potatoes can be baked overnight
in the coals of the fire and either eaten for breakfast as baked potatoes, or sliced into cottage fries that will take roughly
15 to 20 minutes to heat thoroughly throughout and brown a bit. Too, they can be sliced into thin slices and cooked in the
hot grease and served up as fried potatoes in less than 15 minutes.
Fresh fruit is always a good idea, and easy to prepare.
Dinner/Lunch
Depending on the season and/or the way some events go (in terms of the schedule of activities), you may want to stick with
a regular diet of sandwiches for the midday meal, possibly supplemented with soups that can be readily made and heated. If
you want to go hog wild, you can make homemade bread either at the event or bring it from home. Many prefer to bring hard
rolls or French or Italian bread that they can slice in camp.
Still others prefer to make cornbread. Cornbread is of the foods that taste best made in a cast iron skillet, after all,
and can be made relatively quickly. Cornbread and beans or black-eyed peas and hot ham make a geat meal for cold weather.
When a hot meal is desirable but time may be relatively short, a simple soup may be the entire meal, or an anchor of the meal.
Canned black-eyed peas or green beans may also be a good side dish choice for dinner.
In warmer weather, make heavy use of fresh vegetables and fruits. In cooler weather, have apples and oranges available.
Supper
Supper is often provided at events on Saturday night. Quite often, the meal offered is either jambalaya or red beans &
rice or stew. When you've been re-enacting a lot over the course of a season, it may well be that the thought of another jambalaya,
red beans & rice or stew meal is enough to make you go postal. That's when you may want to consider an alternative that
includes you cooking yourself. Since supper is the one where, in all probability, you'll have the luxury of time to prepare
and serve it at your own pace, we will leave it to you to suggest what you should prepare.
Always be mindful of the press for time at an event, for it is easy to plan a great menu for which you will not have the
time to finish the major components before everyone has to go scurrying off. When in doubt, liquid is your friend. Keep hot
water going all the time so you can make coffee or tea when necessary. Keep it for boiling vegetables, including boiling potatoes
if you find yourself in a time crunch. Hot water will jump start a stew or soup.
Many of us in re-enacting have to be careful of our diet because we need to watch our salt intake, or our fat intake, or
our sugar intake, or have other dietary concerns. However, most often we neglect to drink enough fluids and keep our salt
level adequately high when straining to perform tasks and exercises to which we are unaccustomed. Keep foods handy that meets
those needs for you.
BASIC CAMP ETIQUETTE
These are merely suggestions for re-enacting in camps to preserve safety, politeness, as well as a close-to
accurate portrayal of camplife during the Civil War.
Manners that can be applied to a military or civilian camp scenario are an abridgment of street and travel etiquette
found on the Social Etiquette page. Civilians in camp was both a common enough sight as well as being an atypical condition, in that traveling military
camps were a feature of the mid-Victorian age in America for four years only.
In modern society, many fail to make eye contact with passersby, and hesitate to smile or offer a greeting. Particularly
if from a large urban area, we are encouraged by our parents, schools, peers, and law enforcement personnel not to be "too
friendly". In mid-Victorian America, where politeness was next to godliness and a sense of community was far stronger, strangers
felt more compelled to acknowledge one another, and men often felt duty-bound to help a lady. This is not to say that everyone
behaved so, but to read the diaries and letters of many women who worked in or visited camps, we are inclined to believe that
men and women did interact in military situations in a "courtly" manner. But, as many women were there to render aid and comfort
to the sick and wounded, the natural demeanor of the ladies and soldiers would naturally be one of kindness.
While re-enacting, whether working in a civilian camp or gaining entrance to a military camp, a lady should be pleasant
and a gentleman, courteous. It is never appropriate for a lady to visit another unit's camp unescorted or without appropriate
passes from an officer (except within our own unit camp). Not only does military protocol dictate that - and the lady stand
in risk of not being admitted to the camp - but mid-Victorian etiquette also dictated it.
During the War, women gained entrance to military camps for many reasons. For example, some came on business with the US
Sanitary Commission; some with the Christian Commission; others as nurses; some searched for their dead or wounded loved ones
and friends; or some came as volunteer soldiers’ aid. No matter how good or altruistic a cause brought them there, though,
women would not have gained passage through the lines to an encampment without at least one pass, and often a multiple number
of passes.
Some women came to help entertain the soldiers in hospitals or, on occasion, the camps, by singing, recitation, dramatic
readings, and tableaux. For the most part, those sorts of entertainments were conducted by lady volunteers. For those who
were laundresses, camp followers, or prostitutes, they were either there with appropriate permission of a commander, or were
brought in illegally by the soldiers.
Civilian camps as we know them are a concoction of the 20th century re-enactor, and did not exist. As they do exist for
us out of necessity in re-enacting encampments, it would seem best to attempt and follow period etiquette in interacting with
men or strangers entering camp. In 1861, a lady's place in the War was at home, in the hospital, or at the rear (assisting
the wounded and relief agencies), but never in camp unescorted.
Women whose behavior had earned them a demotion from "lady" to "harlot", "trollop", "whore", or "hooker" (although that
sobriquet was not created until the War, as a result of the camp followers that seemed to be so conspicuous and prevalent
around General Joseph Hooker’s army) were able to insinuate themselves into or around military camps or hospitals. The
vast majority of such women were poor, and quite often were addicted to alcohol or drugs such as laudanum (a combination of
alcohol and opium) and opium.
Many became ill with sexually transmitted diseases; Confederate General A.P. Hill was debilitated at a critical point in
the War due to a venereal disease contracted in his younger days. However, they did not always comport themselves around the
camps or hospitals as the corset-and-chemise-only clad strumpets that we see all too often at re-enactments, or in badly researched
movies about the period. (If you wish to portray a "soiled dove" or a "lady of the night", we recommend wearing a low-cut
ballgown instead of only a corset and chemise. This is not only for your own sake, but for the sake of children who will be
in camp with us.)
Prostitutes found in the camps were normally dressed when not actively earning their keep. Their clothing, rather than
being the fanciful feather boas and scarlet red ostrich plumes, was far more apt to be plain and simple, and in a condition
that reflected their own relative state of poverty, which meant that they were often dirty as well. They were generally unlikely
to be adorned with elaborate or heavy makeup. No different from today, many went into the trade of prostitution because of
their poverty, ignorance, lack of skills, desire for "easy money", addiction, or abuse; and some simply because it appealed
to them, at least at first.
While they would have been either ill-used or ignored by the general populace, there are many instances in diaries, journals,
and letters in which relatively kind or benevolent treatment was meted out to such women by the soldiers - at least in the
daytime. Treating them as ladies does them no harm, nor does it depreciate the value of a gentleman's upbringing.
Other camp etiquette suggestions:
Gentlemen, please offer to carry firewood for a lady as well as haul water for her.
Everyone, assist in keeping the camp neat and tidy, helping to put away things before running off to the afternoon battle.
If you feel inclined to help in the cooking, ask the company cook what you can do to help prepare the meal.
If you aren't cooking, after the meal is finished, please offer to help wash dishes.
|